This paper was originally presented at the Southwest Fox
conference in
Roll Your Own
Windows Installer Setups
Rick Borup
Information Technology Associates
Email:
Blog: http://
rickborup.com/blog/
Overview
Microsoft does open source. Sound like an oxymoron? It’s not. In April of 2004, Microsoft released the Windows Installer XML (WiX) toolset under an open source license. The WiX toolset, which is used by several teams within Microsoft itself, enables developers to build Windows Installer setup packages from an XML description of the files, registry entries, shortcuts, and other resources to be installed. This paper discusses how to deploy a Visual FoxPro (VFP) application using WiX, and demonstrates how WiX enables you to achieve complete control over the contents and construction of your application’s Windows Installer setup package.
Windows Installer Refresher
Microsoft® Windows® Installer is Microsoft’s tool to support the installation and configuration of software on Windows computers. If you’re a Visual FoxPro developer, chances are you’ve used Windows Installer, perhaps without even knowing it. That’s because ever since version 7.0, VFP has shipped with a special edition of the InstallShield Express to create deployment packages for Visual FoxPro applications. Like other products of its kind, InstallShield Express creates Windows Installer setup packages. If you’ve ever deployed an app using a setup package you built with InstallShield Express, your setup package has used Windows Installer on the target machine.
What is an MSI file?
Windows Installer setups are driven by a special kind of database file known by its file extension as an MSI file. The installer engine is a program named MSIEXEC.EXE. MSIEXEC performs the installation based on the instructions and resources contained in or referenced by the MSI file. Even when a Windows Installer setup package is built in the form of a self-launching SETUP.EXE, it contains or references an MSI file that Windows Installer uses to run the show.
How do you build an MSI file?
There are several ways to build an MSI file. One way would be to build it by hand using a tool like Orca, the MSI database editor.[1] While Orca is a great tool for editing and inspecting MSI files—and if you work with MSI files at all I suggest you download and install it—using it to build an entire MSI file from scratch would be, to say the least, difficult and time consuming.
The standard way to build an MSI file, of course, is to use a Windows Installer-based setup tool. I already mentioned InstallShield Express, but there are of course a host of other tools you can consider as well, including the full (non-limited) editions of InstallShield Express, the full InstallShield product, Wise for Windows Installer, InstallAware, Advanced Installer, and others. The advantage of using tools like these is that they make things easier for you by insulating you to some extent from the complexities of the MSI file. In other words, by surrendering a certain amount of control you’re relieved from caring about some of the details.
A third way to build as MSI file is to use WiX.
What is WiX?
WiX, an acronym for Windows Installer XML, is a set of tools for building MSI files from an XML source. The WiX toolset, which was released in April of 2004, comprises a schema for describing a Windows Installer database in XML and a set of tools for building a Windows Installer database file from its XML description. When you use WiX, you do give up the convenience of the point-and-click, drag-and-drop type of interface offered by the other tools. But the advantage of using WiX is that you have complete knowledge of and gain complete control over the structure of your MSI file.
Where does WiX come from?
WiX was developed by Microsoft software design engineer Rob Mensching, who was an intern on the Windows Installer team. Rob is also the author of the Orca, the Windows Installer database editor mentioned earlier.
Although WiX is an interesting and useful tool in its own right, one of the things that distinguishes it from most other Microsoft offerings is that is it open source. WiX is available for download from sourceforge.net.[2] There’s nothing to install, just download the binaries and copy them to a directory on your machine. Although the source is also available for download, you don’t need it unless you’re interested in how it works or in actually contributing to the project.
As of this writing, the current version of WiX is 2.0.3309.0, which is the version on which all examples in this paper are based.
Why care about WiX?
You might ask yourself, “Why should I care about WiX?” After all, there are plenty of other tools out there for building MSI files.
My initial answer is that, for one thing, WiX is Microsoft’s first project released under an OSS-approved license (the Common Public License). This alone was enough to attract my attention when it was first released, but it would not have been sufficient to merit my continuing interest—once I got past the initial “Oh, wow, Microsoft is doing open source” reaction—unless there was real value to be found in WiX, which in my opinion there is.
My other reasons why you should care about WiX are these:
- WiX gives you low-level access to and control over your MSI setups. It’s easy to see what’s really going on inside.
- According to its author, WiX generates “very small, very clean” MSI files.
- WiX is used by various teams within Microsoft itself, including Office, SQL Server, parts of Windows itself, and others.
What’s in the WiX toolset?
There are several tools in the WiX toolset. Some of the ones you will most commonly use in building and working with MSI setup files are:
- wix.xsd – the schema for MSI and MSM files
- candle.exe – the compiler; it compiles .wxs files into .wixobj files.
- light.exe – the linker; it links .wixobj files into an .msi file.
- Dark.exe – a decompiler for creating a .wxs file from an .msi file.
All you really need to get started are candle.exe, light.exe, and a text editor.
A first WiX Project
To get started using WiX, create a .wxs (WiX source code) file using your favorite XML editor. The VFP editor works fine and so does Notepad, although you may prefer an editor that provides XML syntax coloring. One of my favorites is EditPlus[3], which can be easily customized to recognize .wxs files as XML and provides syntax coloring accordingly.
Listing 1 is an example of a simple WiX source code file. This file is available as wixdemo1.wxs in the session download.
Listing 1: A simple WiX source code file
<?xml version='1.0'?>
<!-- WiX demo 1 for SWFox 2005 -->
<Wix xmlns='http://schemas.microsoft.com/wix/2003/01/wi'>
<Product Name='WiX Test Package' Id='E7400A72-CDD6-4E09-8102-76A05FAD4500'
Language='1033' Version='1.0.0.0' Manufacturer='Information Technology Associates'>
<Package Id='????????-????-????-????-????????????'
Description='My first WiX test package'
Comments='This is a sample WiX installer package'
Manufacturer='Information Technology Associates'
InstallerVersion='200' Compressed='yes' />
<Directory Id='TARGETDIR' Name='SourceDir'>
<Component Id='MyComponent' Guid='44F6160D-8DD7-44DC-B6D2-F154F33D9ABA' />
</Directory>
<Feature Id='MyFeature' Title='My Feature' Level='1'>
<ComponentRef Id='MyComponent' />
</Feature>
</Product>
</Wix>
Once you have a WiX source code file, three simple steps will turn it into an installable setup file. Do these steps from the Windows Command Prompt. (You do remember the command prompt, don’t you?)
- Use candle.exe to compile the WiX source code file into an object file
candle.exe wixdemo1.wxs
This creates the WiX object code file wixdemo1.wixobj.
- Use light.exe to create an MSI file from the WiX object file.
light.exe wixdemo1.wixobj
This generates wixdemo1.msi.
- Install the product using the Windows Installer engine MSIEXEC.EXE
msiexec /i wixdemo1.msi
And voilà! You’ve just installed the WiX Test Package product on your computer. To uninstall the product, simply do
msiexec /x wixdemo1.msi
Sidebar: What is a Product?
This example provides a good opportunity to illustrate the concept of a “product” in Windows Installer. Windows Installer installs “products”. The WiX source code file in Listing 1 defines a Windows Installer product named WiX Test Package. After MSIEXEC has been run, the product is “installed”, as far as Windows in concerned, even though setup didn’t copy a single file onto the computer! Don’t believe me? Open the Windows Add/Remove Programs (ARP) applet and take a look.

Figure 1: As far as Windows in concerned, the WiX Test Package product is “installed” even though setup didn’t copy a single file onto the computer.
Windows Installer Refresher
A little refresher on Windows Installer concepts and terminology may be helpful here. Windows Installer packages are built from components. A component is a group of one or more related resources—files, shortcuts, registry entries, etc.—that belong together. A file or other resource must belong to one and only one component.
Components are grouped into features. A feature is a group of one or more components that are installed together. A component can belong to one or more features, but each component is installed only once on a give machine.
Think of a Windows Installer setup package as a three-level hierarchy. The product is at the top of that hierarchy. Users can interact with a Windows Installer setup package at the product level, as during a default or typical install, or they might interact with the setup package at the features level, as during a custom install. Developers, on the other hand, have to interact with the setup package at the component and individual resource level.
Every Windows Installer product, package, and component is identified internally by a unique GUID. The product code GUID remains constant for all releases within the same major version of a product. The package code GUID changes for each build that is released into the wild. The component code GUID changes according to the rules governing components. See the Windows Installer Help file for more information.
To close out this refresher, remember that components are targeted for installation to a specific location on the user’s machine. This location is defined by a directory hierarchy specified in the MSI file.
WiX Project No. 2
Now let’s see how to use WiX to create a setup package for a Visual FoxPro application called myVFPApp. The application comprises three files: the executable file myVFPApp.EXE, an HTML Help file named myVFPApp.CHM, and a read me file named readme.TXT. The goal is to install these three files and to create desktop and start menu shortcuts for the executable file.
The WiX source code file for this sample application is shown in Listing 2. The blank lines are included only to make it easier to see the various pieces of the file. This file is available in the session downloads as wixdemo2.wxs.
Listing 2: The WiX source code file for a sample Visual FoxPro application
<?xml version='1.0' encoding='windows-1252'?>
<!-- WiX demo 2 for SWFox 2005 -->
<Wix xmlns='http://schemas.microsoft.com/wix/2003/01/wi'>
<Product Name='myVFPApp 1.0' Id='E9F62B67-AEDB-4358-BA2F-4D93CD291EFC'
UpgradeCode='30B56FAD-ADEF-42EC-9A41-5D634F7CE36F'
Language='1033' Version='1.0.0' Manufacturer='Information Technology Associates'>
<Package Id='????????-????-????-????-????????????'
Description='A WiX package for a sample Visual FoxPro application.'
Comments='myVFPApp is a registered trademark of ITA.'
Manufacturer='Information Technology Associates'
InstallerVersion='200' Compressed='yes' />
<Media Id='1' Cabinet='wixdemo2.cab' EmbedCab='yes' DiskPrompt="myVFPApp CD #1" />
<Property Id='DiskPrompt' Value='myVFPApp 1.0 Installation [1]' />
<Directory Id='TARGETDIR' Name='SourceDir'>
<Directory Id='ProgramFilesFolder' Name='PFiles'>
<Directory Id='ITA' Name='ITA'>
<Directory Id='INSTALLDIR' Name='myVFPApp' LongName='myVFPApp 1.0'>
<Component Id='MainExecutable' Guid='C7FB2458-7A00-4164-8218-247C86849380'>
<File Id='myVFPAppEXE' Name='myVFPApp.exe' LongName='myVFPApp.exe'
DiskId='1' src='myVFPApp.exe' Vital='yes' />
<Shortcut Id="startmenuMyVFPApp" Directory="ProgramMenuDir" Name="myVFPApp"
LongName="myVFPAPP 1.0" Target="Complete" WorkingDirectory='INSTALLDIR'
Icon="myVFPApp.exe" IconIndex="0" />
<Shortcut Id="desktopMyVFPApp" Directory="DesktopFolder" Name="myVFPApp"
LongName="myVFPApp 1.0" Target="Complete" WorkingDirectory='INSTALLDIR'
Icon="myVFPApp.exe" IconIndex="0" />
<RemoveFolder Id='ProgramMenuDir' On='uninstall' />
</Component>
<Component Id='ReadMe' Guid='8019571C-4F69-4ECF-9504-911E45897865'>
<File Id='ReadMe' Name='myReadme.txt' DiskId='1' src='myReadme.txt' />
</Component>
<Component Id='HelpFile' Guid='F4C401F1-CE6F-48F6-A9B0-FC63D52A34A1'>
<File Id='HelpFile' Name='myVFPApp.chm' DiskId='1' src='myVFPApp.chm' />
<Shortcut Id="startmenuHelp" Directory="ProgramMenuDir" Name="Help"
LongName="myVFPApp Help File" Target="Complete" />
</Component>
</Directory>
</Directory>
</Directory>
<Directory Id="ProgramMenuFolder" Name="PMenu" LongName="Programs">
<Directory Id="ProgramMenuDir" Name='myVFPApp' LongName="myVFPApp 1.0" />
</Directory>
<Directory Id="DesktopFolder" Name="Desktop" />
</Directory>
<Feature Id='Complete' Level='1'>
<ComponentRef Id='MainExecutable' />
<ComponentRef Id='ReadMe' />
<ComponentRef Id='HelpFile' />
</Feature>
<Icon Id="myVFPApp.exe" src="myVFPApp.exe" />
</Product>
</Wix>
While this is obviously a more complicated file than the first example, knowing the concepts behind a Windows Installer setup package makes it relatively easy to understand what’s going on.
Several things are worth noting about this file. The Product element gives the product its name and establishes its product code GUID, which can be seen as the in the familiar 8-4-4-4-12 pattern of hexadecimal characters in the Id attribute. An upgrade code GUID can also established in the Product element, as illustrated by the UpgradeCode attribute.
As you would expect, the package code GUID is set in the Package element, but in Listing 2 the package code GUID is written as a string of question marks instead of a string of hexadecimal characters. Why is this? Remember that unlike the product code and the upgrade code GUIDs, the package code GUID is supposed to change every time you build the package. WiX helps you do this by inserting a new GUID whenever it sees one written as a string of question marks in the source code file.
The nested Directory tags specify the target location for the files being installed by this package. In this case, the destination is \ITA\myVFPApp under the user’s Program Files directory.
As you can see from Listing 2, this package is configured as three components named MainExecutable, ReadMe, and HelpFile. Each component installs one of the three files, while the MainExecutable component also creates the two shortcuts. As the developer, the decision about how to assign files and other resources to components is yours. It would have been perfectly okay and equally valid to place all three files in the same component, but using three components makes for a better example.
Near the bottom of Listing 1 you can see this setup package offers only one feature called Complete, which installs all three components. The ComponentRef elements within the Feature element associate the components with the feature(s) to which they belong.
Compiling, linking, and installing this product follows exactly the same steps as the first example.
candle wixdemo2.wxs
light wixdemo2.wixobj
msiexec /i wixdemo2.msi
Whenever you run MSIEXEC, you can tell it to create a log file as it goes along. Inspecting this log file tells you exactly what Windows Installer actually did as it installed the product. Log files are mostly used for debugging, but it can be educational to look through them even when there are no errors.
To generate a log file, add the /l parameter (that’s an “l” as in “log”), like this:
msiexec /i wixdemo2.msi /l* wixdemo2.log
Use /l* to log all information. Use /l*v to create a verbose log of all information. The log file for this particular install runs about 250 lines. A portion of it is shown in Figure 2.
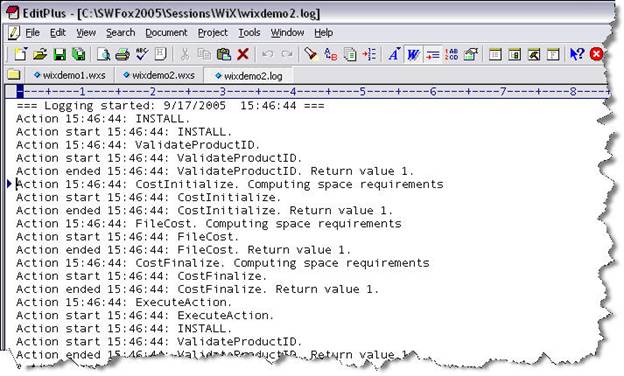
Figure 2: MSIEXEC creates a log file if you use the /l parameter.
As before, you can uninstall the product by running MSIEXEC with the /x parameter.
msiexec /x wixdemo2.msi
Using merge modules
Although Listing 2 is a valid WiX source code file for a VFP app, it does not install the VFP runtime support library files. Microsoft makes the VFP runtime files available for distribution in the form of Windows Installer merge modules.
WiX makes it easy to include merge modules in your source file. Simply insert a Merge element that references the desired merge module. Listing 3 is the WiX source code to incorporate the four merge modules typically included when deploying a VFP 9.0 app. These lines are part of the third example named wixdemo3.wxs. The file is too large to reproduce in its entirety here, but it is included in the session downloads.
Listing 3: Use a <Merge> element to include a merge module.
<Merge Id='Module_VFPGDIPlus' Language='1033'
src='C:\SWFox2005\VFP9 Merge Modules\VFP_GDIPlus.msm' DiskId='1' />
<Merge Id='Module_VFP9Runtime' Language='1033'
src='C:\SWFox2005\VFP9 Merge Modules\VFP9Runtime.msm' DiskId='1' />
<Merge Id='Module_VFP9HTMLHelp' Language='1033'
src='C:\SWFox2005\VFP9 Merge Modules\VFP9HTMLHelp.msm' DiskId='1' />
<Merge Id='Module_MSVCR71' Language='1033'
src='C:\SWFox2005\VFP9 Merge Modules\VC_User_
For each Merge element, add a corresponding MergeRef element to the feature with which the merge module should be installed. As in the previous examples, there is only one feature defined in widemo3.wxs. The Feature element from that example is shown in Listing 4. Note the Id attribute of the MergeRef element must match the Id attribute of the Merge element to which it refers.
Listing 4: Add a <MergeRef> element for each <Merge> element.
<Feature Id='Complete' Level='1'>
<ComponentRef Id='MainExecutable' />
<ComponentRef Id='ReadMe' />
<ComponentRef Id='HelpFile' />
<MergeRef Id='Module_VFPGDIPlus' />
<MergeRef Id='Module_VFP9Runtime' />
<MergeRef Id='Module_VFP9HTMLHelp' />
<MergeRef Id='Module_MSVCR71' />
</Feature>
VFP 9.0 Merge Modules
I’ve run into two issues using the VFP 9.0 merge modules in a WiX source file as illustrated in wixdemo3.wxs. One issue is that the merge module for the C++ v7.1 runtime support file installs MSVCR71.DLL to the root directory of the drive instead of to the INSTALLDIR, where it is supposed to go. I struggled with this problem for a quite a while before consulting the WiX support mailing list, where I found that other Visual Studio developers using this merge module had encountered the same problem. Rather than spend any more time trying to figure out what was wrong, either with the merge module or with the way I was using it in WiX, I simply decided to abandon use of that particular merge module and install MSVCR71.DLL to INSTALLDIR just like any other file.
The other issue relates to the creation of registry entries for the VFP 9.0 runtime files. The merge modules for these files contain instructions to write the necessary registry entries. What I found, however, is that this wasn’t happening on the target machine and so the VFP app wouldn’t run even though it was installed. The solution I used was to add explicit instructions in the WiX source code file to be sure the WriteRegistryValues action is included in the InstallExecuteSequence table (see the Windows Installer Help file and the WiX Help file for more information on these terms). This seems to have solved the problem.
A revised version of example 3 containing these two changes is available in the session download as wixdemo3_revised.wxs.
Merge modules aren’t so mysterious
A merge module is just a pre-packaged set of components for others to use. Although most of us typically use merge modules written by others—the VFP 9.0 runtime merge modules written by Microsoft are a good example—you can also write you own merge module from scratch.
To create a merge module with WiX, simply use a Module element instead of a Product element and use the same GUID for the Module that you use for the Package. Because a merge module always in installs the same resources and because it may potentially be used by thousands of different developers deploying thousands of different applications, a merge module’s GUID is frozen at the time it’s created and never changes after that.
The WiX source code to create a merge module looks very much like the source code for a product. Listing 5 shows the code to create a merge module that installs a file named myFile.txt. The code is available in the session downloads as my Module.wxs.
Listing 5: Use a Module element to create a merge module with WiX.
<?xml version="1.0" encoding="utf-8"?>
<!-- Original contributed by Marc Borgers. -->
<!-- Paths and filenames changed by Gabor Deak Jahn. -->
<!-- Modifications by Rick Borup -->
<Wix xmlns="http://schemas.microsoft.com/wix/2003/01/wi">
<Module Id='File1' Guid='97151078-9040-44AE-85F5-3326D42291A8' Language='0' Version='1.0.0'>
<Package Id='97151078-9040-44AE-85F5-3326D42291A8' InstallerVersion='200'
Languages='1033' Manufacturer='Information Technology Associates'
SummaryCodepage='1252' AdminImage='no' ShortNames='no' />
<Directory Id='TARGETDIR' Name='SourceDir'>
<Directory Id='ProgramFilesFolder' Name='PFiles'>
<Directory Id='ITA' Name='ITA'>
<Directory Id='INSTALLDIR' Name='myFile' LongName='myFile 1.0'>
<Component
Id='File1' Guid='
<File Id='File1' Name='myFile.txt' src='myFile.txt' />
</Component>
</Directory>
</Directory>
</Directory>
</Directory>
</Module>
</Wix>
Use candle and light to compile and link the WiX source code file into an .msm file and you’re ready to go.
Adding a user interface
One important piece still missing from our WiX-generated setup package is a user interface. Although you can certainly install a product from an .msi file without providing a user interface—the three examples presented so far do this, for example—you customarily want to be able to provide the user with a license agreement, dialogs to change the installation directory and to select features in a custom install, and so forth.
Windows Installer does not have a built-in user interface, so Windows Installer-based setup tools such as InstallShield and Wise for Windows Installer provide one for you. When you use WiX, however, you need to build in your own user interface. Fortunately, this isn’t hard to do.
Probably the easiest way to begin constructing your own user interface is to start with one that’s already been built. Among the choices are the free UISample.msi, which is available from Microsoft as part of the Platform SDK for Windows Installer, or to use the WiX toolset decompiler program dark.exe to convert an existing .msi file to XML, inspect its user interface, see how it was constructed, and build your own from that.
The good news is that as of release 2.0.3220.0, WiX now supplies its own user interface for you to use. This interface has three versions, each of which comes in its own file with a wixlib file name extension. These three files, along with the bitmaps required by the user interface, are in the ‘ui’ folder of the WiX binaries download. The WiX tutorial describes the difference between the three versions.
Separately, there is a new user interface editor called WixTool currently under development. You can find WixTool at http://wixtool.org/.
A sample user interface
While the details of the user interface itself are beyond the scope of this paper, the mechanism for including a user interface in your WiX source code file is quite simple.
In a WiX source code file, the user interface goes in the UI element surrounded by the <UI> and </UI> tags. One way to get it there is to copy and paste the entire user interface element text—which, as you can image, can be quite lengthy—into the source file. This is illustrated in file wixdemo4.wxs, which is available in the session downloads.
The easier way, however, is to insert the user interface from an external file using the UIRef tag[4], as shown in Listing 6. This listing also illustrates some additional attributes in the Feature element that are relevant to the user interface, as well as showing how a product can be configured as two features. The entire file for this example is available in the session downloads as wixdemo6.wxs.
Listing 6: Use the <UIRef> tag to incorporate an external user interface file.
<Feature Id='Complete' Title='myVFPApp 1.0' Description='The complete package.'
TypicalDefault='install' Display='expand' Level='1'
ConfigurableDirectory='INSTALLDIR'>
<Feature Id='MainProgram' Title='Program Files' Description='The main executable.'
TypicalDefault='install' Level='1'>
<ComponentRef Id='MainExecutable' />
<ComponentRef Id='ReadMe' />
<ComponentRef Id='VC71RuntimeDLL' />
<MergeRef Id='Module_VFPGDIPlus' />
<MergeRef Id='Module_VFP9Runtime' />
</Feature>
<Feature Id='HelpFile' Title='Help File' Description='The HTML Help file.' Level='1'>
<ComponentRef Id='HelpFile' />
<MergeRef Id='Module_VFP9HTMLHelp' />
</Feature>
</Feature>
<UIRef Id='WixUI' />
<Icon Id="myVFPApp.exe" src="myVFPApp.exe" />
Compile this source code as you would any other, using candle.exe. To build the .msi file, you need to tell light.exe to include one of the three WixUI wixlib files in addition to the wixdemo6.wixobj file you generated with candle. Also, because you are linking more than one file, light requires you to use the –out parameter to specify the name of the output file. For example, if you decide to use the wixui_mondo version of the user interface the syntax would be
light –out wixdemo6.msi wixdemo6.wixobj wixui_mondo.wixlib
One additional requirement of this user interface is there must be a license file named license.rtf.
Using fragments
A fragment is a way of breaking up a large WiX source file into smaller pieces. Fragments are stored as .wxs files and are defined by the Fragment element. In the main source file, a FragmentRef tag is used to incorporate the fragment into the whole.
Although it now requires its own UIRef tag instead of the FragmentRef tag, the user interface piece is still one good example of where a fragment is useful. The advantage of using a fragment is that it enables reuse of static code common to several different products. Fragments are also useful when working in a multi-developer teams because each developer can work on one or more fragments that can later be combined to make the complete source file.
WiX also allows for the use of include files. These files, which are analogous to header (.h) files, are stored with a .wxi file name extension.
Other things to mention
The WiX toolset includes other tools besides candle and light. As mentioned earlier, the decompiler dark.exe generates XML from an existing .msi or .msm file. This is very useful as a learning tool as well as a debugging tool.
Tallow is a source code generation tool. It walks a directory tree and creates a WiX fragment for the files it finds. Tallow can configure the fragment as one single component for all files in each directory, or as individual components for each individual file.
Running tallow.exe as shown below generates the WiX fragment shown in Listing 7.
tallow -nologo -d \swfox2005\sessions\wix\distrib > distrib.wxs
Listing 7: Tallow generated this fragment from the files in the sample ‘distrib’ directory.
<Wix xmlns="http://schemas.microsoft.com/wix/2003/01/wi">
<Fragment>
<DirectoryRef Id="TARGETDIR">
<Directory Id="directory0" Name="distrib">
<Component Id="component0" DiskId="1">
<File Id="file0" Name="myvfpapp.chm" src="C:\SWFox2005\distrib\myvfpapp.chm" />
<File Id="file1" Name="myvfpapp.exe" src="C:\SWFox2005\distrib\myvfpapp.exe" />
<File Id="file2" Name="readme.txt" src="C:\SWFox2005\distrib\readme.txt" />
</Component>
<Directory Id="directory1" Name="Data">
<Component Id="component1" DiskId="1">
<File Id="file3" Name="CUSTOM~1.CDX" LongName="customers.CDX"
src="C:\SWFox2005\distrib\Data\customers.CDX" />
<File Id="file4" Name="CUSTOM~1.DBF" LongName="customers.DBF"
src="C:\SWFox2005\distrib\Data\customers.DBF" />
</Component>
</Directory>
</Directory>
</DirectoryRef>
</Fragment>
</Wix>
Alternatively, running tallow.exe with the -1 parameter as shown below generates the WiX fragment shown in Listing 8.
tallow -nologo -1 -d \swfox2005\sessions\wix\distrib > distrib1.wxs
Listing 8: With the -1 parameter, tallow generates one component for each file.
<Wix xmlns="http://schemas.microsoft.com/wix/2003/01/wi">
<Fragment>
<DirectoryRef Id="TARGETDIR">
<Directory Id="directory0" Name="distrib">
<Component Id="component0" DiskId="1">
<File Id="file0" Name="myvfpapp.chm"
src="C:\SWFox2005\Sessions\WiX\Distrib\myvfpapp.chm" />
</Component>
<Component Id="component1" DiskId="1">
<File Id="file1" Name="myvfpapp.exe"
src="C:\SWFox2005\Sessions\WiX\Distrib\myvfpapp.exe" />
</Component>
<Component Id="component2" DiskId="1">
<File Id="file2" Name="readme.txt"
src="C:\SWFox2005\Sessions\WiX\Distrib\readme.txt" />
</Component>
<Directory Id="directory1" Name="Data">
<Component Id="component3" DiskId="1">
<File Id="file3" Name="CUSTOM~1.CDX" LongName="customers.CDX"
src="C:\SWFox2005\Sessions\WiX\Distrib\Data\customers.CDX" />
</Component>
<Component Id="component4" DiskId="1">
<File Id="file4" Name="CUSTOM~1.DBF" LongName="customers.DBF"
src="C:\SWFox2005\Sessions\WiX\Distrib\Data\customers.DBF" />
</Component>
</Directory>
</Directory>
</DirectoryRef>
</Fragment>
</Wix>
Running tallow.exe with the /? parameter displays its usage syntax and parameter values.
Finally, there is Votive. Votive is a Visual Studio 2003 extension that provides intellisense and integrated support for candle and light within VS2003. Votive is a separate download from the rest of WiX.
Conclusion
WiX is a really useful tool that represents an interesting departure from the usual Windows Installer setup tools. Although it obliges you to know more about the structure of your Windows Installer setup file than other tools do, in return it provides you with much more control over the structure of your setup than most other tools do. Because it is XML based, you can easily create WiX source code files using your favorite text or XML editor. Although WiX has been around only since April of 2004, it has attracted a lot of attention and is being used by many developers including some within Microsoft itself. If you’re comfortable with XML and are interested in achieving fine-grained control over your Windows Installer setups, WiX is the tool for you.
Acknowledgements
I am indebted to several sources for information about WiX. One of the most helpful is the excellent tutorial by Gábor Deák Jahn, available at www.tramontana.co.hu/wix/. The Help file included with WiX itself is also a fine reference. WiX author Rob Mensching writes about WiX and other topics on his blog at http://blogs.msdn.com/robmen/rss.aspx. Rob also authored an article for MSDN entitled Using the WiX Toolset to Integrate Setup into Your Development Process, available at http://msdn.microsoft.com/library/en-us/dnwingen/html/wixsetup.asp. Support for WiX is available via the WiX project mailing lists on the SourceForge® website; the searchable wix-users archive at http://sourceforge.net/mailarchive/forum.php?forum_id=39978 has been a great source for answers and information posted by other WiX users.
About the author
Rick Borup is an independent developer specializing in the
design, development, and support of mission-critical business software
solutions for small to medium-size businesses. Rick earned B.S. and M.B.A.
degrees from the
Copyright ©
2005 by Rick Borup.
Microsoft,
Windows, Visual FoxPro, and other terms are either registered trademarks or
trademarks of Microsoft Corporation in the